Now that you’ve downloaded, installed, and activated the Bootplate theme, you’re ready to start setting things up.
The following quick tutorials are nothing required and will change a bit depending on various child themes. But we gotta start somewhere. Feel free to look over these things in any order you want. The following isn’t a required process.
Add Some Pages
For varying reasons, we like to start WordPress projects building-out at least all our top-level pages. We may offer a sample content download file here, but that’s not ready yet. See GitHub issue #26.
When creating each page, you can also select a Template under Page Attributes. Here are the options as of Bootplate v0.5.
- Default Page Template (full-width, narrow header)
- Page: Right Sidebar
- Page: Left Sidebar
- Page: Full Height
- Page: Full Width
- Page: Home Page
- Page: Search
We would HIGHLY recommend you create a blank page with the title of something like “Search” and give it the page template “Page: Search”.
Also, you might consider creating your home page using the “Page: Home Page” template, but that part is totally up to you.
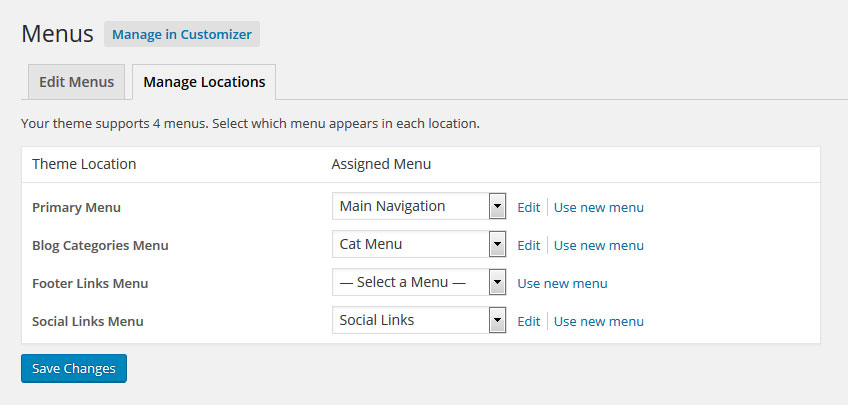
Create a Menu (or two)
There are four (4) basic menus that Bootplate registers once activated.
- Primary Menu
- Blog Categories Menu
- Footer Links Menu
- Social Links Menu
The Primary Menu is used at the top of the site as the, well, primary navigation. We recommend creating a new menu, adding a handful of pages or items to it, and assigning it to the “Primary Menu theme location.”
Footer Links
These are less-important, but still global links used in the footer of your new Bootplate-powered website. There are no custom styling added to these links, unlike the Social Links menu.
The intention here was for these to be navigation items like About, Terms, Privacy, whatever.

Don’t want it? Just don’t assign any custom menu to this theme location and Bootplate will skip it.
Social Links
Enter Custom Links to your social properties and assign that menu to the Social Links Menu theme location. Using CSS3, Bootplate will attempt to detect the social website by address and replace the word, Facebook (for example) with the Facebook icon instead.

Supported social networks include:
- Pintrest
- Google Plus
- GitHub
Simple.
Blog Categories Menu
This theme location will be used to create above the fold navigation for blog categories, but it’s not done yet as of Bootplate v1.
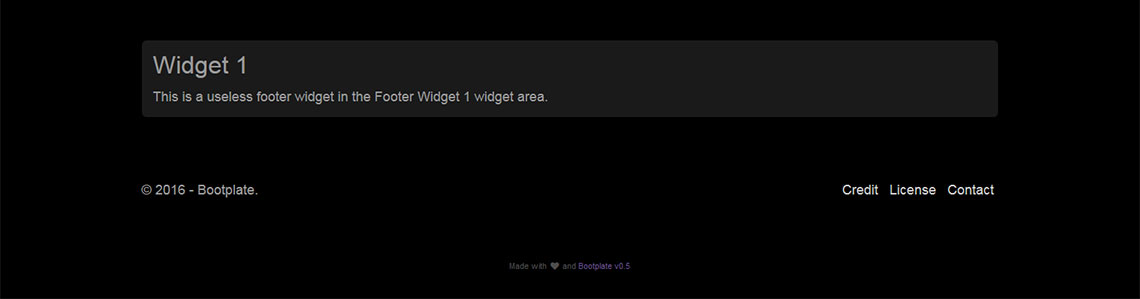
Footer Widgets
Bootplate comes with up to four widgets in its footer. However, it’ll show only the ones you setup (from left to right). So, if you drag & drop a widget into only the Footer Widget 1 area, the footer will show a single, full-width widget area in the footer.
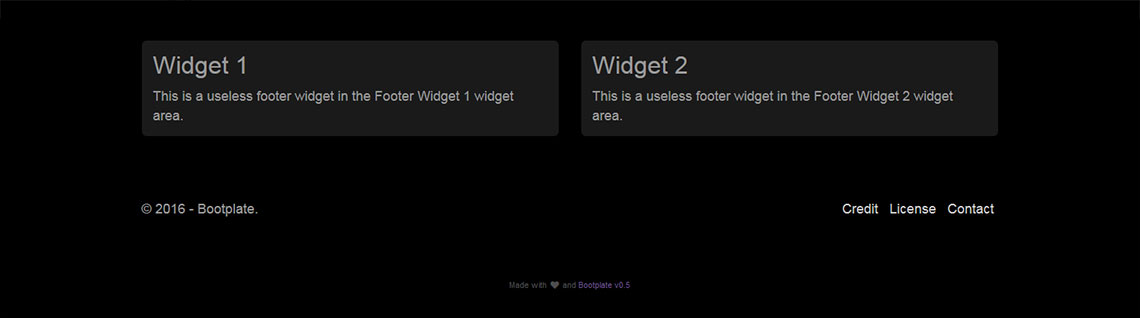
Drag & Drop widgets into BOTH the Footer Widget 1 and Footer Widget 2 areas, you’ll end up with a two-column widget footer.
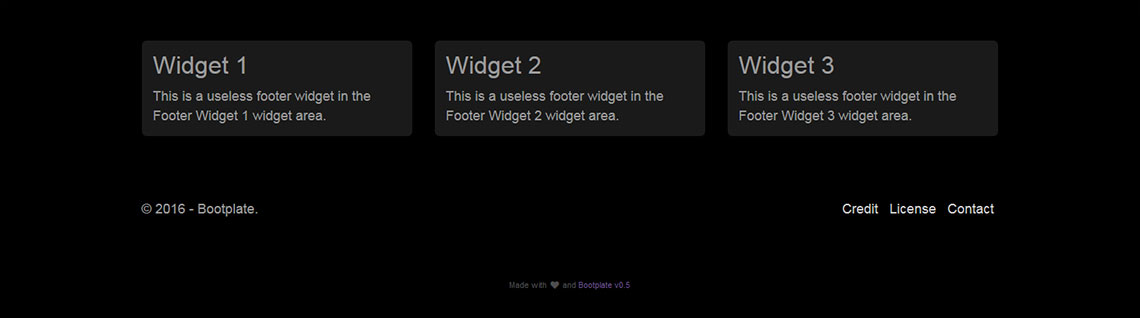
That works all the way up to 4–a 1/4, 1/4, 1/4, 1/4 widgetized footer. You get it.
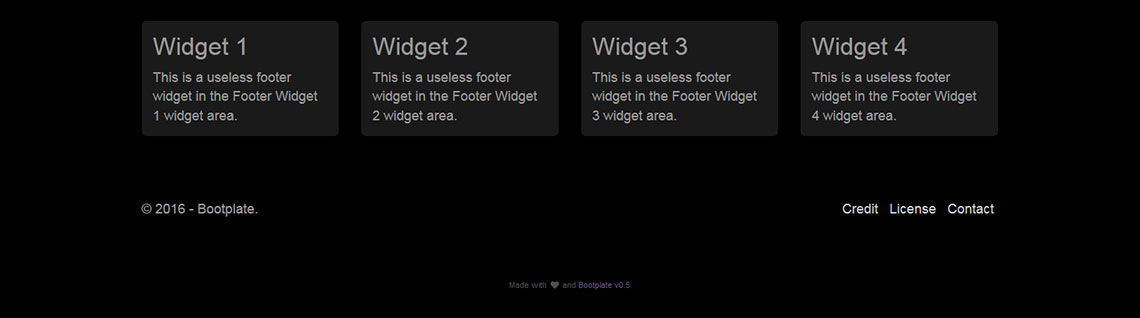
As a matter of preference, we don’t really like global footer widget areas, but that’s an “us” thing. You’re welcome to have all 4 active and working in there you want.
Sidebar Widgets
There are three (3) sidebar widget areas registered when Bootplate gets activated.
- Blog Sidebar
- Page Sidebar Right
- Page Sidebar Left
The blog sidebar widget area is displayed on the right-hand side of blog category listings and archives–not on single posts.
The Page Sidebar Right widget is shown when viewing pages using the Page: Sidebar Right template. The same thing goes for the Page Sidebar Left widget area displaying on pages using the Page: Sidebar Left template.
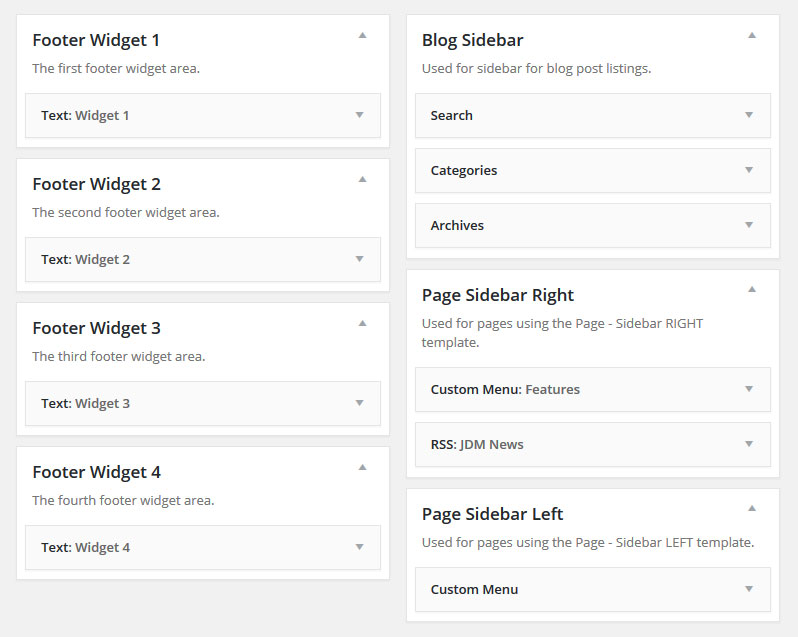
If you want to add a heck of a lot more sidebars, consider installing Custom Sidebars plugin from @wpmudev.
Customization
Customization should be done primarily through Child Themes, but there are a few things you can customize in real-time using the WordPress Customizer and the Bootplate theme options panel.
Let’s take a look at how to make Bootplate your own.