Creating your first Bootplate child theme is pretty easy. You can choose from a handful of pre-built child themes we’ve done for you, or download a (mostly) blank starter child theme to get started fast.
Here’s how to build your own, custom Bootplate child theme from scratch, well, mostly from scratch.
Step 1: Install GitHub Updater
Bootplate is not, yet, available on the WordPress.org theme repo. In order to install it AND enable automatic updates, we’ll need a special plugin called GitHub Updater to install and update Bootplate automatically. Unfortunately, we have to do this the old fashioned way.
- Download the latest tagged archive (choose the “zip” option) of GitHub Updater.
- Unzip the archive, rename the folder to
github-updater. - Copy the folder to your
/wp-content/plugins/directory and upload via FTP. - Go to the Plugins screen and click Activate.
- Once activated, head over to Settings >> GitHub Updater to finish the setup.
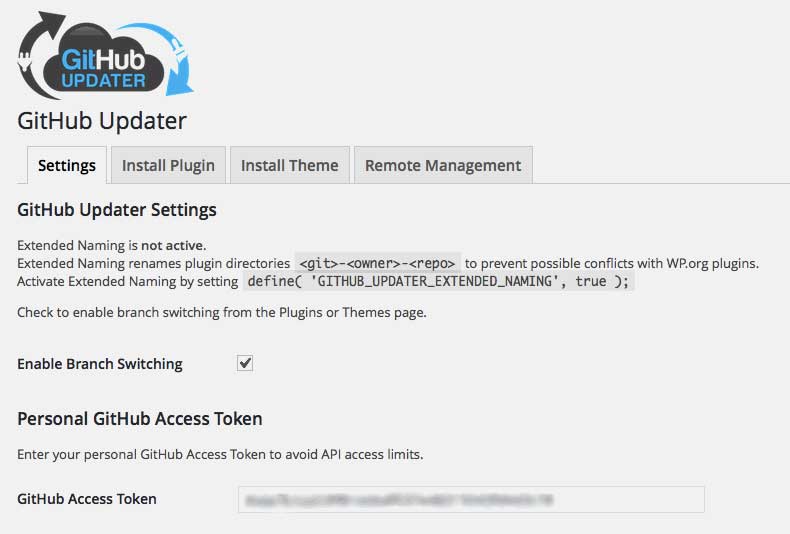
The first thing you’ll want to do is setup your Personal GitHub access token. All you need is a free GitHub account and 3 minutes. Here’s how to get one of those.
Once you’ve got it, just paste it into the GitHub Access Token field and click Save Changes.
Step 2: Install Bootplate (Parent)
Now that you’ve got GitHub Updater installed, let’s install Bootplate though the GitHub Updater interface. If you install Bootplate via FTP instead, you won’t receive automatic updates. Here’s how.
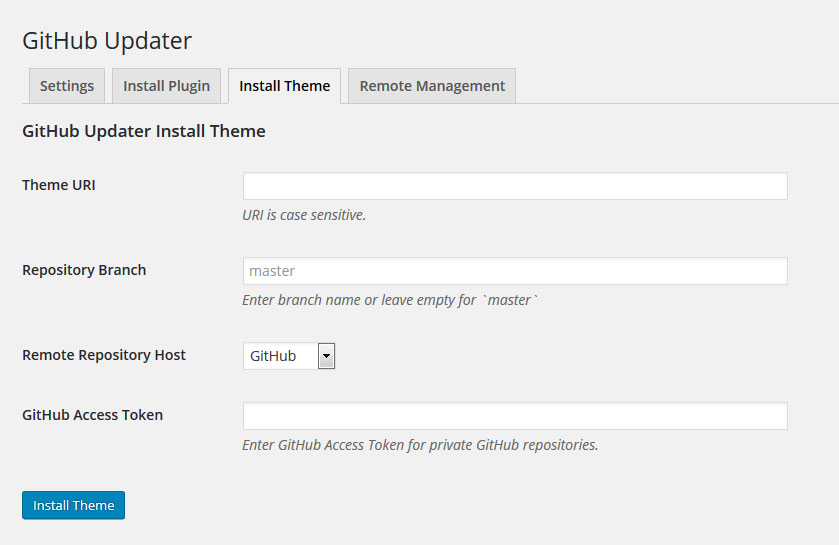
- Head over to Settings >> GitHub Updater
- Click the Install Theme tab
- Paste Bootplate’s GitHub URL into the Theme URI field:
https://github.com/jdmdigital/bootplate - Leave “Repository Branch” blank.
- Remote Repository Host should be “GitHub” (obviously)
- Leave the access token blank. Bootplate’s repo is public.
- Click the Install Theme button at the bottom.
That’s it. Bootplate is now installed. It’s not active, and that’s ok. We don’t care about that yet.
Step 3: Setup Custom Child Theme
So we’re not totally starting from scratch, let’s start this build using our free bootplate-child starter theme. It contains only the bear minimum files to get started.
Here’s how to get started with your own custom Bootplate Child Theme:
- Navigate to your location version of your WordPress install /wp-content/themes/
- Create a new, empty directory with whatever name you want for your new them.
- We recommend something short, all lowercase, with no spaces (use hyphens instead)
- It’s also a good idea to make sure it’s something unique. Heaven forbid a naming conflict later.
- Download bootplate-child from GitHub: https://github.com/jdmdigital/bootplate-child
- There’s a “Download Zip” button.
- Or just click here.
- Save the zip somewhere like your desktop.
- Unzip the file, called something like
bootplate-child-master.zip - Open the directory inside it, /bootplate-child-master/
- Copy the following files:
- style.css
- functions.php
- screenshot.png
- The other files are GitHub stuff and you don’t really need those.
- Paste those three files into the new theme directory you created.
Great! Now, let’s fire up your favorite HTML editor, like Dreamweaver, and make a few small modifications.
Step 4: Basic Configuration
You’re so close to finished it’s scary. There’s just a couple little changes to make before you upload and activate your new WordPress theme.
Child Theme Mods
Fire up your favorite HTML editor, like DreamWeaver, and make a few small modifications to the three files we pasted out of /bootplate-child/.
In style.css, there are some comments at the top. Let’s change the “Theme Name:” from “ChildPlate” to whatever you want to call your theme. You can also edit the theme URI, or delete the whole line. You could write a little description, if you want. We might recommend changing the Author and Author URI from “JDM Digital” to you. After all, YOU’RE the author now!
You’ll also see there’s some starter styles here. You can come back to those later.
Open up the function.php file. We’ve got just a couple edits to make here too. First off, let’s change the comments at the top to something else. How about, “My Awesome Theme Functions – v1.” It really doesn’t matter here the way it does in style.css.
As of version 1.5 of Bootplate, you can also copy the /css/body.css and /css/body.min.css into your child theme directory. Bootplate will detect and use THAT styesheet. This is important because that stylesheet gets loaded asynchronously and dead-last.
That’s it for the little mods we need to make. You could create a nifty screenshot.png file of the same size as the one included (1200px x 900px), but you don’t have to.
Basic Theme Setup
Now that you’re all configured, we just need to be sure everything is saved and then upload the whole directory we just created (which should only contain 3 files at this point).
Once that’s done:
- Login to your WordPress Admin
- Go to Appearance >> Themes
- Click the Activate button on your new theme
Once activated, you can configure your new child theme using all the options in Bootplate using the Theme Customizer.
Step 5: Make it Yours!
Child themes have access to all the customization options in their parent. For Bootplate Child Themes, all theme options are within the Theme Customizer (Appearance >> Customize).
Because it’s a Child Theme, you can overwrite anything in Bootplate without making the parent functions and files UN-upgradeable. Here’s a few examples of what you can do now.
Change all the styles
Make any and all changes to your child theme’s style.css file. They’ll overwrite what’s included in Bootplate’s–which is loading a smaller file-size version called /css/parent.css (or parent.min.css if you’ve set the minification theme option).
Add a Google Font
To add a Google Font, you’ll just need to enqueue it in your functions.php file. Here’s the code enqueue add the “Lato” Google Font, purely as an example.
wp_enqueue_style( 'google-font', 'https://fonts.googleapis.com/css?family=Lato');
I would recommend adding it just above all that is_child_theme() stuff and above or below the wp_enqueue_style( 'bootstrap'... line.
Change the Navigation
You already have a few options on navigation type, position, and style. But you might want something totally different. That’s cool. Just copy nav.php from the /themes/bootplate/ directory into your child theme’s directory and edit away.
Add a New Page Template
Much like changing the page navigation, to add a new page template for your child theme, just fine a template already created in Bootplate that’s “close enough” and “Save As” a different filename in your child theme’s directory.
The same process works for ALL page, post, category, etc. templates.
Overwrite a Core Function
Want to write a function in your functions.php file that does something different than one of our core functions? Go for it. ALL Bootplate functions are “plugable”, meaning they are all wrapped in an if(!function_exists('')) statement.
That’s nerd-speak for just create a function with the same name in your child theme’s functions.php file and WordPress (PHP, actually) will use your function and ignore the original core function. After all, at that point, the function_exists. Get it? PHP humor…
Automatic Updates
Since you installed Bootplate using GitHub Updater, whenever a new version of the Bootplate Theme core is released, you’ll receive a notification for an automatic update. Just click Update Theme and it’s done.
Best of all, because you’re using a Child Theme, you don’t have to worry about that update messing up your design. Remember, your (child) theme is actually in charge of Bootplate (the Parent theme). The upgrade may simply fix security issues or add new functionality you can use or ignore.
The Parent theme is NOT in charge. Gasp!